How to Remove Old Oil Stains from Clothes: 5 DIY Solutions to Try
Some clothing stains seem almost impossible to remove. Red wine, pen ink, and oil, we’re looking at you! Today, we’re tackling oil stains with not just one, but five easy DIY methods, prepared by Sheets Laundry Club experts. Prepare to part ways with those unsightly spots for good.
Try These Simple Methods At Home
Depending on what ingredients you have in your pantry, try these solutions at home to beat even the most stubborn oil stains. After applying any of these methods, be sure that the stain is completely removed before placing your clothing in the dryer as heat from the dryer can make the stain harder to remove. If the stain still persists, repeat the treatment process or try a different method!
The Cornmeal Method
What You Need:
- Box of cornmeal
- Soft brush
- Water
- Unused toothbrush
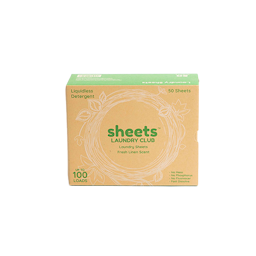
- Sheets Laundry Club Detergent Sheet
Follow These Steps:
- Place a couple spoonfuls of cornmeal directly onto the stain to soak up the oil.
- Leave the cornmeal on for at least 15 minutes.
- Scoop the cornmeal off the stain.
- Brush off the remaining with a soft brush.
- Mix together water, a small toothbrush, and a laundry detergent sheet to make a paste.
- Brush the paste directly onto the stain with the toothbrush.
- Rinse out the stain with warm water.
- Wash the clothing item as you normally would, following care instructions.
Watch this short video for a quick recap!
The Baking Soda or Cornstarch Method
What You Need:
- Baking soda OR cornstarch - that’s it!
Follow These Steps:
- Use a clean paper towel or cloth to blot up as much of the oil as possible. Avoid rubbing, as this can push the oil deeper into the fabric.
- Sprinkle baking soda or cornstarch directly on the stain. These powders absorb the oil from the fabric.
- Let it sit for 15 - 30 minutes, then brush off the powder.
- Wash the clothing item as you normally would, following care instructions.
The Dish Soap Method
What You Need:
- Liquid dish soap
- Soft brush
- Hot water
Follow These Steps:
- Squeeze a small amount of liquid dish detergent onto the stain. As dish soap is designed to cut through grease, it can work very well on oil stains.
- Gently work the soap into the fabric with your fingers or a soft brush.
- Rinse the area with hot water (if the fabric allows). The heat helps break down the oil molecules.
- Wash the clothing item as you normally would, following care instructions.
The White Vinegar Method
What You Need:
- White vinegar
- Water
Follow These Steps:
- Mix equal parts white vinegar and water.
- Apply the mixture directly to the stain.
- Let it sit for 10-15 minutes.
- Rinse and wash the clothing item as you normally would, following care instructions.
The WD40 Method
For getting old oil stains out of clothes that have been soiled for a long time, try this heavy-duty method using WD40. This lubricant and rust penetrant has many uses around the house and in the car. If you don’t have WD40 at home, it can easily be found at any hardware store.
What You Need:
- Two small bowls
- Piece of cardboard
- WD40
- A Q-tip
- Baking soda
- Unused toothbrush
- Sheets Laundry Club Detergent sheet
Follow These Steps:
- Protect your garment by sliding a piece of cardboard into the clothing item behind the stain. This will prevent the stain from spreading to the opposite side of the garment.
- Spray some WD40 into a small bowl.
- Lightly dab the entire stain with WD40 using a Q-tip.
- Sprinkle a generous layer of baking soda over the entirety of the stain.
- Use the toothbrush to scrub the baking soda into the WD40.
- Wait until the baking soda begins to clump. This means it’s starting to mix with and absorb the WD40.
- Once it has clumped together, use the toothbrush to scrape the baking soda off of the stain.
- Add a small amount of warm water to the second bowl.
- Add 1/10 of a Sheets Laundry Club Detergent sheet into the bowl.
- Use the toothbrush to move the laundry sheet around until it dissolves, creating a smooth, liquid detergent.
- Using the toothbrush, scrub the stain with the detergent mixture.
- Wash the clothing item as you normally would, following care instructions.
The Ultimate Laundry TLC Plan: Sheets Laundry Club
With these simple methods in your laundry arsenal, there is no oil stain you can’t beat! If you ever need a refresher on how to remove old oil stains from clothes, or want to share your newfound knowledge with friends, here’s a quick video recap: How to remove oil stain from cotton and synthetic clothing.
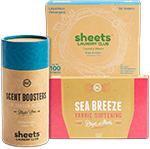
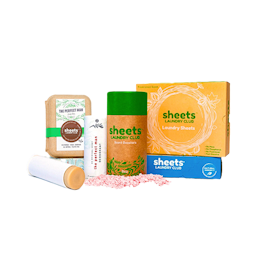
As for the rest of your laundry, Sheets Laundry Club is there to care for your clothes day after day, month after month. With our super easy subscribe and save service, you can sign up for laundry subscription boxes packed with all your favorite laundry supplies, including our critically acclaimed Laundry Detergent Sheets. If you need any more laundry or stain advice, please reach out to our friendly team or follow us on social media for expert tips and regular updates!


